Posts

Week 9 (FYP 2)

Image
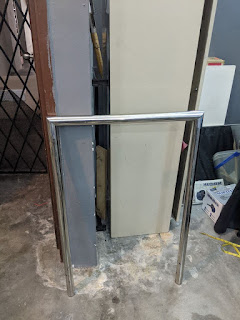
Activity: Refurbished Push Cylinder Module Objective: To push the metal sheet down towards the conveyor 2 smoothly To look neater and have a strong build Content: The push cylinder module will push the metal sheet down towards the conveyor 2 The sensing capability of this module is provided by a proximity sensor which is installed into a metal cylinder frame fixed at an angle of 90° to the rear of the pushing cylinder. If the proximity sensor detects a well stamped metal sheet, it will send signal to the pushing cylinder. The pushing cylinder will then move forward to push the metal sheet down towards conveyor 2. Result: After I add a metal support below the push cylinder, the result is it become  stronger and more stable when it push the metal plate.  Conclusion: However, I need to fix the mount of proximity sensor  because sometimes it can't detect the metal sheet when the metal sheet arrive to the sensor. 

Week 8 (FYP 2)

Activity: Refurbish Motor and Conveyor Objective: To allow the conveyor to move smoothly To allow the motor to rotate properly To look neater on the conveyor Content: Originally conveyors 1 and 2 did not move properly because the tension belts were already rusty. So I had to loosen the conveyor belt and remove the tension belt to be cleaned and the roller replaced. The roller on the tension belt is rubbed with lubricating oil to smooth the rotational movement. After cleaning the roller, it needs to be reinstalled as original. But I have adjusted the tension belt so that the conveyor is more tense and moves well especially the upper conveyor. For the motor, I was clean up the connection and the mount Result: As a result, conveyors 1 and 2 can move well. Conveyor 2 which is downward conveyer is move faster than upper conveyor because the it have less tensioner roller than upper conveyor.  Conclusion: Even though the upper conveyor is moving slowly, it can help the sensor to dete...

Week 7 (FYP 2)

Activity: Adjust Blynk Application Objective: To run components on a project using the Blynk application To achieve the goals of the IoT project To show the correct real time value of Temperature Content: Each button on the application should be assigned the correct and aligned output pin on the NodeMCU board. In the application, there are 3 buttons, namely start, stop, reset and emergency stop It also have 1 LCD display and 1 Gauge Meter for the temperature. Result: After set each pin output, all the button working successfully.  The input for Gauge Meter is V3 so the temperature value show correct value. Notification to trigger the user if PIR sensor detect any movement also working successfully. Conclusion: The conclusion this week is that the problems previously encountered can be solved well.

Week 6 (FYP 2)

Image
Activity: Installation of Arduino Board & Sensors Objective: To connect the Arduino board and the sensors. To ensure that the sensor functions properly. To test the connection between Arduino and Blynk application. Content: The Arduino model used is the Arduino NodeMCU ESP8266 The coding from the Arduino software is transferred to the NodeMCU using a micro usb cable. After the NodeMCU is successfully run (the light on the board is on), it is then connected to the used sensors such as PIR sensor, temperature sensor, IR sensor and connection to relay. Connection of IoT Result: All of these sensors work fine. Connection between Blynk application and NodeMCU works as well. But, button on the application was not function and the display of temperature does not show the correct value.  Conclusion: the problem I am facing now is that I need to adjust the app on the Blynk. Each button and gauge need to set their pin 

Week 5 (FYP 2)

Image
Activity: Connect PLC program to Hardware Objective: To connect the PLC system to the hardware To enable the project to function as programmed To make sure every part of the project works well Content: After the PLC coding is uploaded to the PLC device which is model CQ1MH, the PLC will be connected to the hardware. All output and input wires from the hardware are connected to the PLC The inputs such as start and stop push buttons, proximity sensor and magnetic reed sensors are connected to the input panel of PLC A wire from the COM port on the PLC input and output panel is connected to the busbar of the negative 24VDC. Component PLC Address Result: The PLC was successfully connected unfortunately, the system cannot run automatically even the coding was upload on the PLC device After read the manual, the PLC model used which is CQ1MH cannot run automatically, it needs to be connected to laptop and set to 'run' mode on the CX-programmer software Conclusion   Therefore, eve...

Week 4 (FYP 2)

Image
Activity: Install wheels and Handle on the wooden board Objective: The handle is to make it easier for the user to push the project The wheel is to make it easier for the project to be moved Content: First, I measured the suitable size of handles needed to be installed on the project. After that I made a sketch design of the handle.  The material that I choose for the holder is stainless steel For the wheel, I choose 6 inch wheel because the project is quite heavy.  Result: Conclusion: The handle and the wheel is successful install on the project. 

Week 3 (FYP 2)

Activity: Fix the Arduino coding and learn about PLC coding. Objective: To compile and run the NodeMCU To connect between the NodeMCU an Blynk application. To find out more detail about PLC programming.  Content: The error messaged that I get after compile the coding is state about the library on my computer is multiple or have the same library found in the system. So i need to clear the multiple library and only add the necessary library.    Result: After doing some research and assisted by professional about the software, i get the solution for my problem.  The solution is I need to clear all the library because the software not state which library have multiple. Co nclusion: The conclusion on this activity is i should require more information and doing study about how the software works. I also need to know how to create the coding for further use.